
I started a few days ago planning out the details of my project. Theres a lot that I don't know so its a total learning experience. One thing i didn't consider before buying the parts was how i was going to connect everything up, theres only so many input pins. So I put this together in paint to get a visual:

Ahh, good old mspaint. Things look good and theres plenty of extra pins, no worries.
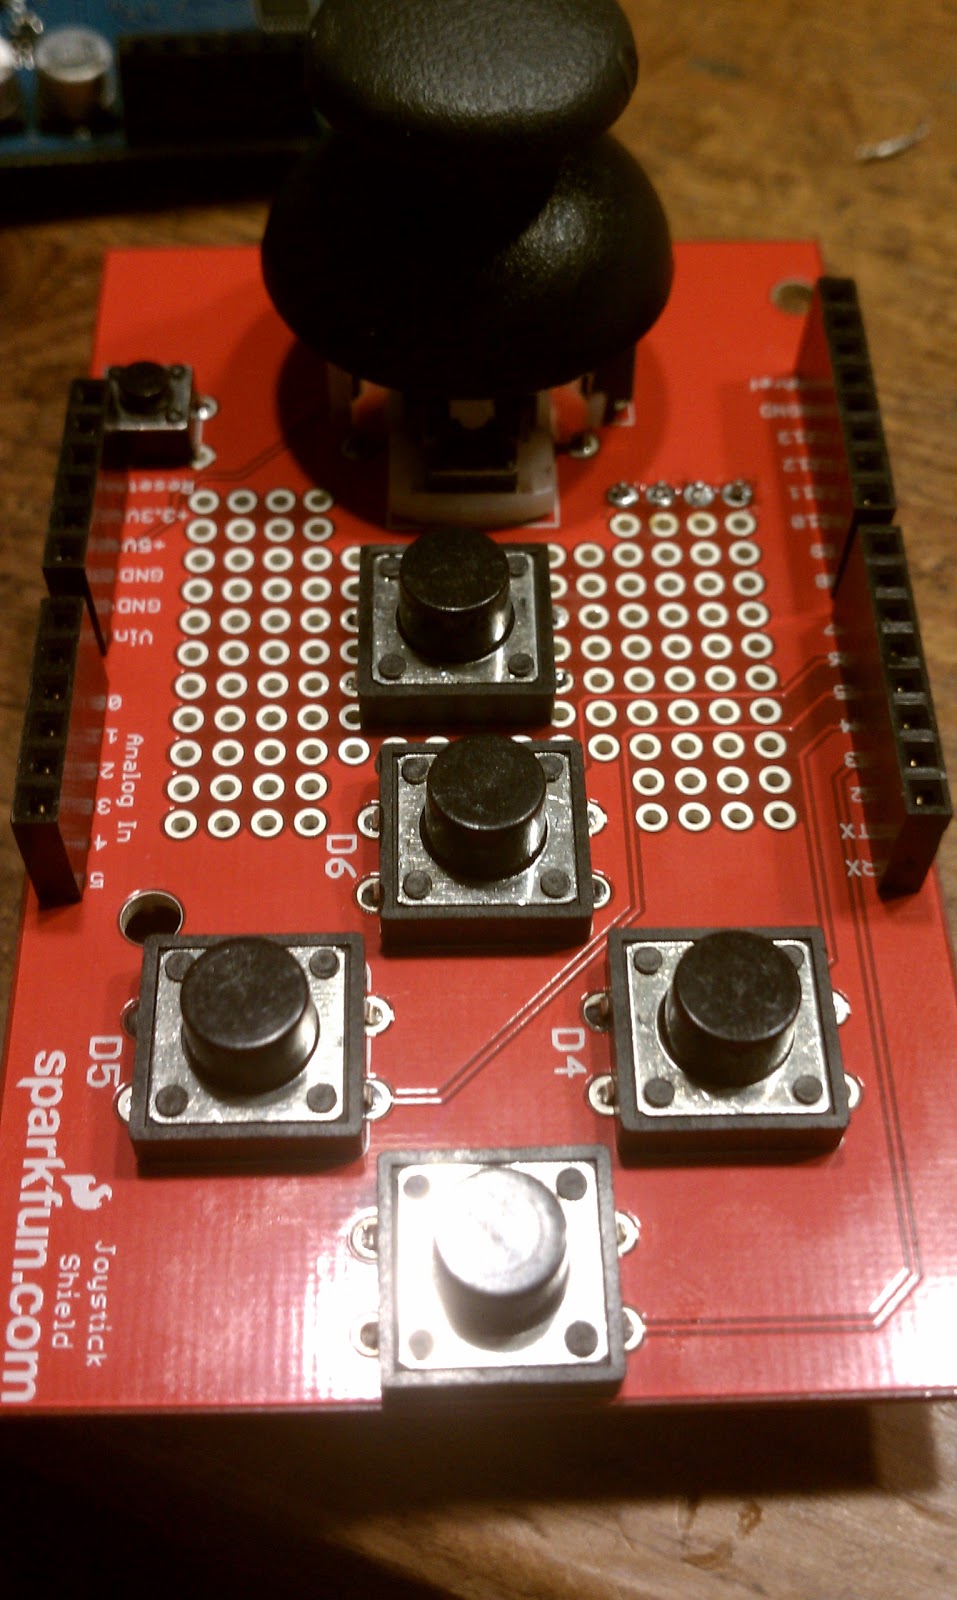
If you can tell, theres a 5th Push Button Switch, identical from the others that wasn't in my original parts list. This is because i totally forgot about the start and select buttons. The joystick has a pushbutton built in that i'll use for select but i needed a separate start button. Also, you may be wondering, if you are knowledgeable about SNES controllers, that theres no left or right shoulder buttons. For now, i left them out but i do have room to put them in later. The original scope of the project though was to build a controller to play Legend of Zelda which happens to not utilize the Left or Right shoulder buttons. Also, i'd need to find or make my own PCB in order to to place them in a spot that can be utilized as originally intended. As for putting all the parts together for the Joystick, Sparkfun.com has a great tutorial on building the Joystick here. I'm going to divert to this tutorial for this part of the project, they can explain thing and show them off better then I can anyway.
The next problem is where Im going to place the Bluetooth card in all this. With luck the card is actually very small. I guess i just didn't conceptualize it right but what i ended up doing was soldering it to the underside of the joystick PCB. Like so:


Excuse my soldering job, I'm still learning. As you can see in the pictures, i used some breakaway headers and attached it to the prototyping area. Theres plenty of room, so much so that i was able to run lines around and under the Bluetooth modem. Also as a note, the joystick board doesn't sit all the way down on my Arduino's headers due to the usb port, so i used that to my advantage while wiring.
Once i got the hardware all connected, i need to get configuation data from the joystick. Sparkfun.com has an amazing tutorial to get started with their joystick here. Again, i'm going to divert to their tutorial over explaining things here, its better then anything I work up as an amateur.
The next part is getting the Bluetooth to connect to my phone. For this project, I've found an app on the android market called BlueTerm by pymasde.es. Its free and open source, which is awesome. What we are going to do here is take what we've learned from Joystick tutorial and instead of outputting the data over the usb connection, we are going to forward it over the Bluetooth connection and see if the BlueTerm app will pick it up. The great thing though is, we wont have to modify the code at all to get this to work. The way I wired the Bluetooth modem is via the TX and RX pins on the Arduino board which should send everything we are doing to the modem. One catch, you cant have the Bluetooth modem connected to the TX/RX pins while uploading, it wont work. I slightly modified their final code to add my new button and adjust the output:
First thing I did was pair the device like normal under the phones Bluetooth settings. The pass code for the Bluetooth modem is default "1234". I Then fired up BlueTerm and connected to the Bluetooth modem:// Store the Arduino pin associated with each input
// Select button is triggered when joystick is pressed
const byte PIN_BUTTON_SELECT = 2;
const byte PIN_BUTTON_START = 7;
const byte PIN_BUTTON_RIGHT = 3;
const byte PIN_BUTTON_UP = 4;
const byte PIN_BUTTON_DOWN = 5;
const byte PIN_BUTTON_LEFT = 6;
const byte PIN_ANALOG_X = 0;
const byte PIN_ANALOG_Y = 1;
void setup() {
// Start the Serial connection
Serial.begin(115200);
// Read the input from the digital pin (1 and 0)
pinMode(PIN_BUTTON_RIGHT, INPUT);
digitalWrite(PIN_BUTTON_RIGHT, HIGH);
pinMode(PIN_BUTTON_LEFT, INPUT);
digitalWrite(PIN_BUTTON_LEFT, HIGH);
pinMode(PIN_BUTTON_UP, INPUT);
digitalWrite(PIN_BUTTON_UP, HIGH);
pinMode(PIN_BUTTON_DOWN, INPUT);
digitalWrite(PIN_BUTTON_DOWN, HIGH);
pinMode(PIN_BUTTON_SELECT, INPUT);
digitalWrite(PIN_BUTTON_SELECT, HIGH);
pinMode(PIN_BUTTON_START, INPUT);
digitalWrite(PIN_BUTTON_START, HIGH);
}
// start the loop reading the pin data and printing that data over the serial conncetion
void loop()
{
Serial.print("left:");
Serial.print(digitalRead(PIN_BUTTON_LEFT));
Serial.print(" ");
Serial.print("right:");
Serial.print(digitalRead(PIN_BUTTON_RIGHT));
Serial.print(" ");
Serial.print("up:");
Serial.print(digitalRead(PIN_BUTTON_UP));
Serial.print(" ");
Serial.print("down:");
Serial.print(digitalRead(PIN_BUTTON_DOWN));
Serial.print(" ");
Serial.print("x:");
Serial.print(analogRead(PIN_ANALOG_X));
Serial.print(" ");
Serial.print("y:");
Serial.print(analogRead(PIN_ANALOG_Y));
Serial.print(" ");
Serial.print("select:");
Serial.print(digitalRead(PIN_BUTTON_SELECT));
Serial.print(" ");
Serial.print("start:");
Serial.print(digitalRead(PIN_BUTTON_START));
Serial.print(" ");
Serial.println();
delay(500);
}

Immediately I got the serial output just like i should which was very exciting. I tested the range and i was getting signal from a lot further then i'd ever need it to be, even if i had it output to a TV.


The last image shows me pressing one of the buttons while moving the joystick. The delay in the code is set to half a second but if i pulled it out, you'd see x,y coordinates move more fluidly. The next problem is getting the phone to take the input its receiving and act like its key presses on a keyboard. This is where i hit a wall and where im going to have to come back. Its looking like i may need to write my own, or "borrow" a software keyboard app that accepts the inputs and tags them to a alphanumeric key. Luckily, Google has a example software keyboard in their Android SDK that I'm going to take a look at and see how it works. Another lucky break is that theres a guy that wrote a toolkit called Amarino that makes it easier to interface my Arduino to my Android. Hopefully it will be some help in this regard. Now i need to go read up on everything. Later!
Sounds like a great project! Looking forward to seeing it finished.
ReplyDeleteThanks! This project has been a lot of fun!
ReplyDelete